There’s nothing quite like the look on a kid’s face when a home experiment flops. The volcano dribbles instead of erupts. The slime stays glue. The potato battery refuses to light anything, and everyone shuffles away disappointed. I’ve been there more times than I care to admit, running a weekend science club for my own kids and a rotating cast of neighbourhood volunteers.
The good news is that most failed experiments fail for boring, fixable reasons. If you want to know how to improve your home science experiments, you don’t need fancy equipment or a science degree. You need to control a few variables, upgrade a couple of materials, and write down what actually happened. Small tweaks in setup and measurement make a huge difference, and once you see that difference, the whole hobby gets addictive.
Why Do Home Science Experiments Fail So Often?
Most failures fall into a handful of predictable categories. The kitchen is a chaotic laboratory. Room temperature swings, tap water varies by postcode, and the measuring spoons in your drawer might be decorative rather than accurate. When an experiment depends on a chemical reaction, even a ten percent difference in concentration can turn a fizz into a shrug.
Another common culprit is impatience. Kids want to see something happen in thirty seconds. Many reactions take minutes, and some take hours. If you check too early, you conclude the experiment failed when it simply hadn’t finished. I’ve watched a crystal-growing jar get declared a disaster at the four-hour mark, then produce beautiful shapes overnight once everyone went to bed.
Instructions copied from random corners of the internet also cause trouble. Some recipes assume distilled water, others assume tap. Some say “a spoonful” without specifying size. A tablespoon of baking soda is roughly three times a teaspoon, which is the difference between a gentle bubble and a foaming overflow onto the counter. Reading the method carefully before starting, and checking that every quantity has a unit, prevents most of this.
Finally, there’s the environment. A draughty windowsill ruins temperature-sensitive experiments. Direct sunlight bleaches colours and warms containers unevenly. A wobbly table turns a careful measurement into a spill. Before blaming the science, check the room.
Controlling Variables at Home Without a Lab
You don’t need a laboratory to run a fair test. You need to change one thing at a time. That’s the whole idea behind a controlled experiment, and it works just as well on a kitchen table as it does in a research facility. Pick the variable you’re testing, keep everything else identical, and run a comparison alongside it.
Suppose you’re testing which liquid makes a plant grow fastest. Use identical cups, identical soil, identical light, and identical starting plant size. The only difference should be the liquid. If one cup sits nearer the window, you’ve introduced a second variable and learned nothing useful. I keep a roll of masking tape and a marker handy so every container gets labelled with its condition. It sounds fussy, but it stops the classic mid-experiment confusion of “wait, which one was the salt water?”
Temperature is the variable people forget most often. Reactions speed up when warm and slow down when cold. If you’re comparing two mixtures, let both come to room temperature first, or place both in the same spot. Don’t run one on the radiator and the other by the back door.
Timing matters too. Use a phone timer rather than counting in your head, and start it at the same moment for each trial. If you’re measuring how long something takes, decide in advance what counts as “done.” A clear endpoint, like “first bubble reaches the surface,” removes guesswork.
Repeat everything at least twice. One result is an anecdote. Two matching results start to look like a pattern. Three is even better. Kids grumble about repetition until they see their own results line up, and then they get genuinely proud of the consistency.
Upgrading Your Materials for Better Results
You can improve a huge number of experiments just by swapping cheap or vague materials for better ones. This doesn’t mean spending a fortune. It means being deliberate about what you use.
Start with water. If your tap water is hard, it contains dissolved minerals that can interfere with reactions. Distilled water from a supermarket costs very little and removes that uncertainty. For anything involving solutions, it’s one of the best upgrades you can make.
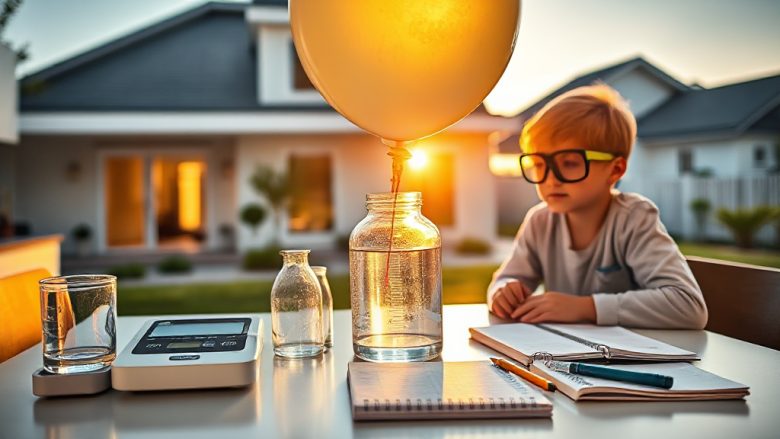
Measuring tools are the next big win. Kitchen measuring spoons are often inaccurate, and eyeballing “a pinch” is hopeless for repeatable results. A cheap digital scale that reads to one gram, plus a set of proper graduated cylinders or even a marked medicine cup, transforms your precision. Once you can measure properly, you can change quantities on purpose instead of by accident.
Containers matter more than people expect. Clear glass or plastic lets you watch what’s happening. Wide-mouthed jars are easier to clean and less likely to trap bubbles. If you’re growing crystals, a shallow dish gives you more surface area and faster evaporation. If you’re doing anything with heat, use heatproof glass rather than a random jam jar that might crack.
Don’t overlook the humble thermometer and timer. A digital probe thermometer takes the guesswork out of temperature, and a simple stopwatch keeps everyone honest. These two tools alone will make your results far more consistent.
One more upgrade worth considering: buy two of anything cheap. Two identical cups, two identical spoons, two identical plants. Comparisons are the heart of good science, and having matching equipment makes them fair.
Documenting Results So You Actually Learn Something
An experiment you don’t record is an experiment you’ll repeat by accident. Documentation is where casual kitchen messing becomes real science, and it’s also where kids learn the most.
Keep it simple. A notebook with columns for date, what you changed, what you observed, and what you think it means is plenty. Encourage drawings alongside words, especially for younger children. A quick sketch of bubble size or crystal shape often captures detail that words miss.
Photograph the setup at the start and the result at the end, from the same angle and in the same light. Photos are brilliant for spotting changes you didn’t notice at the time. Just avoid relying on memory, because memory is a terrible lab partner.
Write down failures too. A failed experiment where you know why it failed is more valuable than a success you can’t explain. If the slime stayed glue, note that you used cold water and the wrong ratio. Next time, you’ll fix it, and that note is the reason.
Review your notes before repeating anything. Patterns emerge quickly when you read back through a few weeks of entries. You might notice that every successful batch happened on a dry day, or that your best crystals grew in the cooler corner of the room. Those observations are the whole point.
A Quick Safety Refresher Before You Start
Home science is safe when it’s done sensibly, but a few habits keep it that way. Always assume anything you mix could splash. Wear eye protection for anything involving acids, bases, or vigorous reactions, and keep a bowl of clean water nearby for rinsing skin or eyes.
Never taste or sniff unknown mixtures. If you want to observe a smell, waft it toward your nose with your hand rather than putting your face over the container. Ventilate the room when using vinegar, ammonia, or anything with strong fumes.
Keep experiments away from food preparation areas, and never store chemicals in drink bottles or food containers. Kids can’t tell the difference, and mistakes happen fast. Label everything clearly, and store anything questionable out of reach.
Supervise younger children closely, especially around heat, glass, and anything sharp. And if an experiment calls for a material you don’t recognise or can’t source safely, skip it. There are hundreds of excellent alternatives that don’t require a trip to a specialist supplier.
Frequently Asked Questions
How do I make home experiments more repeatable?
Change only one thing at a time, measure everything with proper tools, and repeat the whole experiment at least twice. Note the temperature and any conditions you can’t control, because those often explain odd results.
What should I do if my experiment fails?
Write down exactly what you did and what happened, then compare it with the method. Most failures come down to wrong quantities, wrong temperature, or checking too early. Fix one of those and try again.
Do I need expensive equipment to get good results?
No. A digital kitchen scale, a thermometer, a timer, and distilled water cover most upgrades. Clear containers and a notebook handle the rest. Precision matters far more than price.
How can I keep kids interested when results are slow?
Set up a second experiment alongside the slow one so there’s always something happening. Use the waiting time to make predictions and record observations, which keeps everyone engaged with the process rather than just the finale.